Jim Capossela said it well in his book Camp & Trail Cooking Techniques. “There are other ways of baking at a campsite,” he wrote, “but for sheer romance, challenge and mouthwatering anticipation, there is really nothing like a reflector oven.”
The reflector oven is a wonderful gizmo for camp cookery. It’s simple to use, relatively inexpensive and does a professional job of baking biscuits, pies, cakes, cookies, pizza, casseroles and other foods. Imagine the lip-smacking aroma of blackberry cobbler baking on a wilderness backpacking trip, or the incomparable flavor of just-caught, butter-broiled trout savored on the bank of your favorite fishing stream. With a reflector oven, imagination becomes reality.
Searching the Internet using the term “reflector oven” will show a variety of companies from which the ovens can be purchased.
A little history
Reflector ovens were first widely used in the late 1700s. At that time, they were called “tin kitchens,” “tin bakers” or “hasteners,” and were used for cooking on the home hearth. Sizes and designs were myriad. Most were roughly triangular, with a wide opening at the front (the side closest to the fire). The sides, top and bottom sloped toward the back. A tray or grill in the middle held the food, which was cooked using heat reflected from the fire. Many were equipped with a spit for roasting meat.
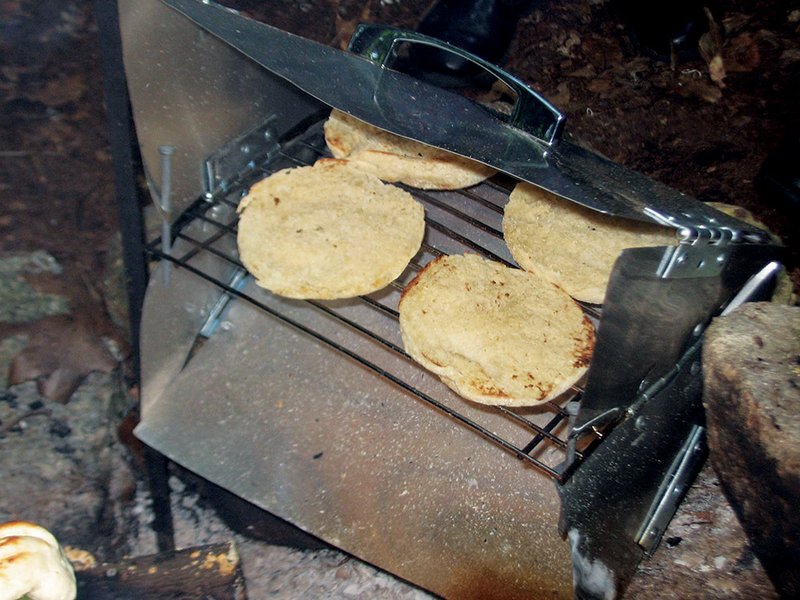
Modern reflector ovens closely resemble these early tin kitchens. With a roaring fire, reflective oven walls and a shelf for food to be baked on, they provide an excellent means for preparing fresh-baked goods outdoors.
The Dutch oven, another 18th-century cooking vessel often used for baking, has experienced a resurgence in popularity in recent years. But reflector ovens have seen no such renaissance. Few of today’s outdoorsmen use them. That’s surprising, because modern reflector ovens offer several advantages over heavy, cast-iron Dutch ovens.
For one thing, the sheet-metal (usually aluminum) reflector oven is lightweight and collapsible. The one I use is a compact 14 by 14 by 1/2 inches when folded and weighs a mere 2 pounds. It easily fits in a backpack or under a truck seat and requires less than a minute to assemble or disassemble. Its services compensate for its relatively slight additional weight, and almost anything I prepare in a Dutch oven can be ready quicker using the reflector.
Dutch ovens, you see, require a bed of hot coals for proper cooking. Reflector ovens, on the other hand, work best with a high flaming fire. No need to wait for the fire to burn down to coals. No need to trample the forest looking for hardwood fuel. A pile of pine branches feeds the fire quite nicely, and in minutes, you’re preparing a baked feast fit for royalty.
How the reflector oven works
The principle by which reflector ovens work is simple. Heat from the open fire is reflected from the shiny interior of the oven. The slanting top and bottom of the reflector direct the heat toward the top and bottom of the pan of food being baked, allowing it to brown evenly on upper and lower surfaces. If the cooking temperature seems too hot or too cool, you can move the oven backward or forward to adjust the temperature. If the food cooks unevenly on the sides, rotate the pan.
The best fire for the reflector is a teepee fire built to the height of the oven’s cooking shelf. If two reflector ovens are available, place them across the fire from each other so the ovens face each other. This provides maximum heat reflection.
Cooking tips
When cooking with a reflector oven, a certain instinct must replace the clearly defined formulas of conventional baking. Variables such as air temperature, wind velocity and fire design can make things difficult for the inexperienced camp cook. But by following a few simple tips, much of the frustration of reflector cooking can be eliminated.
Begin by selecting a flat surface on which to place the oven and build the fire. If necessary, make minor adjustments to compensate for ground that slopes or is bumpy.
Next, gather an ample supply of small wood for the fire. Sticks 1 to 2 inches in diameter are best. Larger wood should be split. Softwoods like pine burn hot and fast, ideal for reflector cooking.
Collapsible designs make some reflector ovens flimsy and prone to overturning. Nothing’s worse than seeing a baking pie dumped in ashes when an oven collapses. Be sure the oven is stable when you set it up, and avoid bumping it while cooking.
Place food on a piece of foil or pan that fits the shelf of the reflector oven, and position the oven near the fire. Knowing just where to place the oven so it heats to the right temperature is the key to good cooking. An oven thermometer on the food shelf helps. But you also can guess the temperature with reasonable accuracy by holding your hand just in front of the oven. If you can hold it there for seven to 10 seconds, the temperature is near 200 degrees; six seconds, 300 degrees; three to four seconds, 400 degrees; one to two seconds, 500 degrees. Use good judgment, however, and don’t get burned.
After five minutes, check the food to be sure it’s cooking properly. If the top is browning faster than the bottom, the fire is too large. If foods are browner on the bottom than on top, the fire is too small. Make adjustments as necessary.
Carry two thick potholders or heavy gloves for moving the oven and handling the food. Most reflector ovens also have a back flap that can be opened now and then to check the food.
Now that you know how to cook, all you need are recipes to try. Here are three of my favorites.
Red Lobster-Style Cheese-Garlic Biscuits
Ingredients:
2 cups Bisquick baking mix
2/3 cup milk
1/2 cup shredded cheddar cheese
1/2 cup margarine or butter, melted
1/4 teaspoon garlic powder
Directions:
Mix Bisquick, milk and cheese until a soft dough forms. Beat vigorously for 30 seconds. Drop dough by spoonfuls onto a sheet of lightly greased aluminum foil cut to fit the shelf of your reflector oven.
Bake 8 to 10 minutes or until golden brown. Mix margarine and garlic powder; brush over tops of warm biscuits.
Little Pizzas
Ingredients:
English muffins
Pizza sauce
Grated mozzarella cheese
Your favorite pizza toppings
Directions:
Lightly brown muffins in the reflector oven. Spread pizza sauce on each half. Crown with cheese and your favorite toppings. Heat on foil until the cheese is bubbly.
Easy Cobbler
Ingredients:
3/4 cup melted butter
1 cup sugar
1 cup flour
2/3 cup milk
1 large can sliced fruit
Directions:
Pour butter into a 8-inch square
casserole. Combine sugar, flour and milk. Pour over butter. Add fruit. Bake until golden brown.