I once took a work trip to do nothing but learn about Irish milk, cheese and butter. Lucky for me, the first thing I ate when I arrived, jet-lagged and haggard, was a scone. I still remember this particular scone because it was fluffier and richer than any scone I’d ever had. After spending a few minutes under the spell of this little morsel, I pulled myself together and asked the chef if it wasn’t, in fact, a biscuit. He insisted that these were his Irish scones, made with Irish butter and milk, and served with a soft pat of butter on the side.
If it really was a scone, it was the best scone I’d ever had, so I asked the chef for his recipe, and I spent the rest of the trip trying to figure out what, in fact, is a real Irish scone.
In the days that followed, I probably ate a dozen scones made from different recipes, and each was unique. I asked chefs, innkeepers, grandmothers and dairy owners for their methods, tips and secrets.
Some said buttermilk is key. Others said, “Absolutely no buttermilk!” Most used “self-raising” flour (“self-rising” if you’re stateside), though some used “cream flour” (all-purpose) and some used cake flour. Some said the butter should be cold, and others said to work softened butter into the mix. Those who insisted that a traditional soda scone was the only way to go had no butter in their recipe at all.
My understanding of the difference between a biscuit and a scone is that a scone has a little sugar (this recipe has sugar) and an egg. But not everyone I spoke to in Ireland put an egg in the dough.
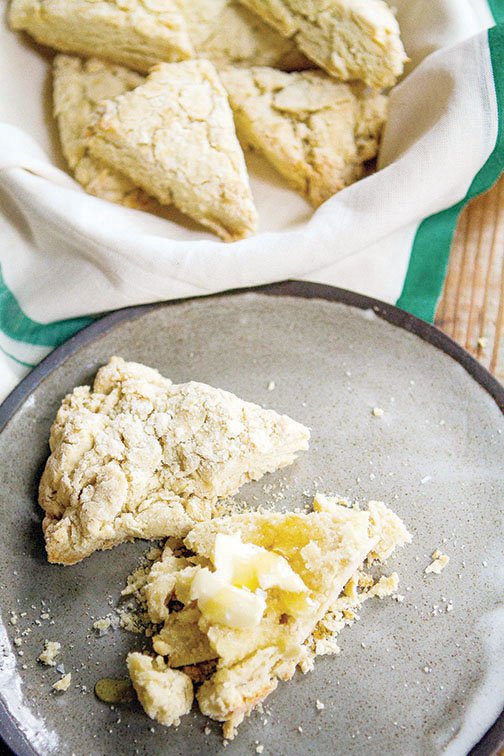
There are a few things all the Irish people I spoke to agreed on about scones: They are best served freshly baked, warm from the oven, with butter, homemade preserves, honey and even some cream. No one seemed particular about the shape or the time of day best for a scone — sultana (raisin) or plain scones for breakfast, savory scones with soup at lunch and sweet scones at teatime.
So, back home, I put together a recipe using all the information I’d collected, plus my own bias for those first scones I had gobbled up in Ireland. These scones are easy to make — from pulling out the ingredients to that first hot bite, only about 20 minutes will pass — but they rely heavily, in my opinion, on the quality of the ingredients, so choose wisely.
I made my own self-rising flour by adding baking powder to fresh all-purpose flour and opted for softened Irish butter. Kerrygold is the brand most easy to track down in the States. I met many of the cows that are responsible for this butter, and I can tell you they have a pretty cushy life. There is no confinement farming in Ireland, and all of their cows are 100 percent grass-fed, which explains the vibrant yellow hue of the butter.
Sure, these scones are more biscuitlike than what you might expect from a traditional Irish scone, but what I learned is that there are infinite definitions of what a real Irish scone is. The
memory of those very first fluffy dream-cloud scones I had when I sat down to my first Irish meal is so strong that, to me, these are now the truest Irish scones. Slathered with unsalted butter, honey and a pinch of sea salt, they pretty much transport me to another plane right here in my stateside kitchen.
Real Irish Scones
Makes 8 to 10 (1 1/2-inch) scones
Ingredients:
2 cups unbleached all-purpose flour
1 tablespoon baking powder
2 teaspoons granulated sugar
1 teaspoon fine salt
4 tablespoons unsalted butter, softened to room temperature
1/2 to 3/4 cup milk, cream or a combination
Directions:
Preheat the oven to 400 degrees. Place a baking sheet lined with parchment paper or a Silpat in the oven.
Sift together the flour, baking powder, sugar and salt into a mixing bowl. Use your fingertips to work the butter into the dry ingredients until the mixture just holds together. Working the mixture as little as possible, add 1/2 cup milk, and mix until it the dough forms into a soft, slightly sticky ball. Add more milk if needed to reach desired consistency.
Place the dough on a very lightly floured work surface. Using a floured rolling pin, gently roll the dough to a 1-inch thick slab. Slice the dough into triangles with a floured knife or bench scraper, or dip a biscuit cutter in flour, and cut out the individual scones.
Remove the baking tray from the oven, and arrange the scones on it. Bake 8 minutes, turn the scones over, and bake another 4 to 6 minutes, or until just barely brown.
Serve with butter, preserves and freshly whipped cream.
Scone variations:
Herb: Add a few tablespoons chopped fresh thyme, rosemary, chives or sage to the dry mixture.
Cheese: Add 1/2 cup grated cheddar or Parmesan cheese to the dry mixture. Brush the tops with beaten egg or cream, and sprinkle with more grated cheese.
Currant: Add 1/2 cup currants (or raisins) to the dry mixture.
Chocolate: Increase the sugar to 2 tablespoons, add 4 ounces chopped semisweet or bittersweet chocolate, and sprinkle each scone with a pinch of raw sugar before baking.
Recipe notes:
To reheat leftover scones, warm them at 350 degrees for 2 to 3 minutes or until warmed through.
To freeze leftover scones, wrap the completely cooled scones in plastic wrap, and place them in a zip-top bag or freezer-safe storage container. To reheat, thaw at room temperature in the plastic wrap; then unwrap, and reheat as above at 350 degrees.
Sara Kate Gillingham is the founding editor of TheKitchn.com, a nationally known blog for people who love food and home cooking. Submit comments or questions to kitchn@apartmenttherapy.com.